Creating realtime chat app in Python
In this tutorial we are going to create a trivial in-memory Chat app that will help you understand Flet framework basics. This app could be a good starting point to creating your own more complex and useful projects.
In this tutorial you will learn how to:
- Create your first Flet app
- Add page controls and handle events
- Broadcast messages using built-in PubSub library
- Use AlertDialog control for accepting user name
- Enhance user interface with re-usable controls
- Deploy the app as a web app
The complete application will look like this:
You can play with a live demo here.
The full code for the chat app can be found here.
Getting started with Flet
It's a tradition to start with "Hello, world!" app!
Flet requires Python 3.8 or above. To create a Flet app in Python, you need to install flet module first:
pip install flet
To upgrade flet module run:
pip install flet --upgrade
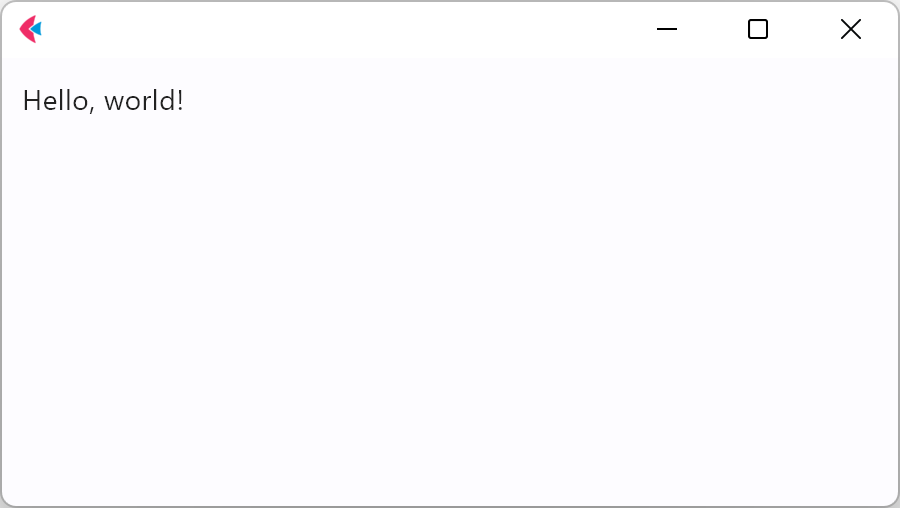
Create hello.py with the following contents:
import flet as ft

def main(page: ft.Page):
    page.add(ft.Text(value="Hello, world!"))

ft.app(target=main)
Run this app and you will see a new window with a greeting:
Adding page controls and handling events
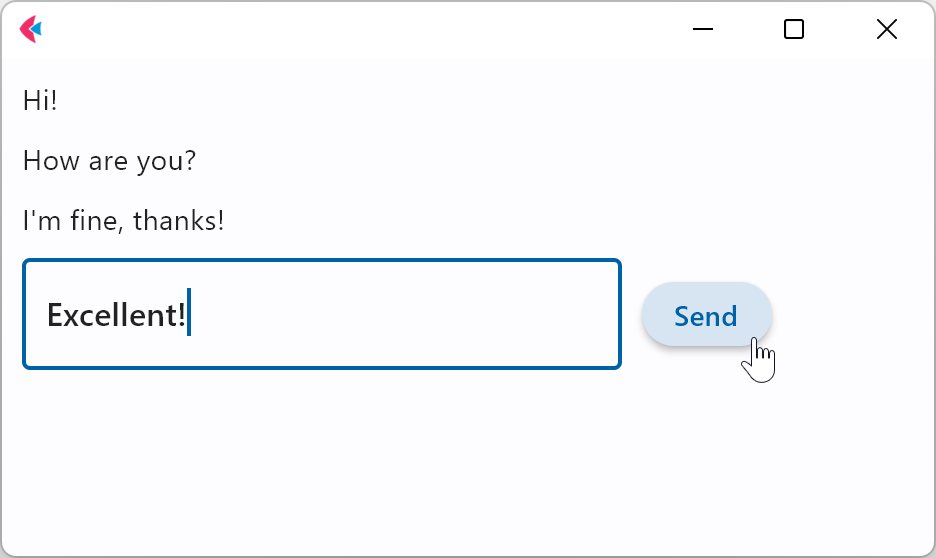
To start, we want to be able to take user input (chat message) and show messages history on the screen. The layout for this step could look like this:

To implement this layout we will be using these Flet controls:
- Column - a container to display chat messages (Text controls) vertically.
- Text - chat message displayed in the chat Column.
- TextField - input control used for taking new message input from the user.
- ElevatedButton - "Send" button that will add new message to the chat Column.
- Row - a container to display TextField and ElevatedButton horizontally.
Create chat.py with the following contents:
import flet as ft

def main(page: ft.Page):
    chat = ft.Column()
    new_message = ft.TextField()

    def send_click(e):
        chat.controls.append(ft.Text(new_message.value))
        new_message.value = ""
        page.update()

    page.add(
        chat, ft.Row(controls=[new_message, ft.ElevatedButton("Send", on_click=send_click)])
    )

ft.app(main, view=ft.AppView.WEB_BROWSER)
When user clicks on the "Send" button, it triggers on_click event which calls send_click method. send_click then adds new Text control to the list of Column controls and clears new_message TextField value.
After any properties of a control are updated, an update() method of the control (or its parent control) should be called for the update to take effect.
Chat app now looks like this:
Broadcasting chat messages
In the previous step we have created a simple web app that takes input from the user and displays chats messages on the screen. If you open this app in two web browser tabs, it will create two app sessions. Each session will have its own list of messages.
To build a realtime chat app, you need to somehow pass the messages between chat app sessions. When a user sends a message, it should be broadcasted to all other app sessions and displayed on their pages.
Flet provides a simple built-in PubSub mechanism for asynchronous communication between page sessions.
First, we need subscribe the user to receive broadcast messages:
page.pubsub.subscribe(on_message)
pubsub.subsribe() method will add current app session to the list of subscribers. It accepts handler as an argument, that will later be called at the moment a publisher calls pubsub.send_all() method.
In the handler we will be adding new message (Text) to the list of chat controls:
    def on_message(message: Message):
        chat.controls.append(ft.Text(f"{message.user}: {message.text}"))
        page.update()
Finally, you need to call pubsub.send_all() method when the user clicks on "Send" button:
    def send_click(e):
        page.pubsub.send_all(Message(user=page.session_id, text=new_message.value))
        new_message.value = ""
        page.update()

    page.add(chat, ft.Row([new_message, ft.ElevatedButton("Send", on_click=send_click)]))
pubsub.send_all() will call the on_message() and pass on the Message object down to it.
Here is the full code for this step:
import flet as ft

class Message():
    def __init__(self, user: str, text: str):
        self.user = user
        self.text = text

def main(page: ft.Page):

    chat = ft.Column()
    new_message = ft.TextField()

    def on_message(message: Message):
        chat.controls.append(ft.Text(f"{message.user}: {message.text}"))
        page.update()

    page.pubsub.subscribe(on_message)

    def send_click(e):
        page.pubsub.send_all(Message(user=page.session_id, text=new_message.value))
        new_message.value = ""
        page.update()

    page.add(chat, ft.Row([new_message, ft.ElevatedButton("Send", on_click=send_click)]))

ft.app(target=main, view=ft.AppView.WEB_BROWSER)
User name dialog
Chat app that you have created in the previous step has basic functionality needed to exchange messages between user sessions. It is not very user-friendly though, since it shows session_id that sent a message, which doesn't tell much about who you are communicating with.
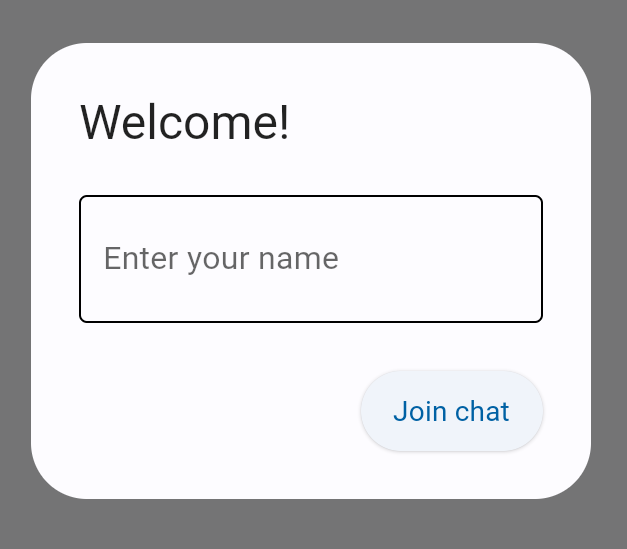
Let's improve our app to show user name instead of session_id for each message. To capture user name, we will be using AlertDialog control. Let's add it to the page:
    user_name = ft.TextField(label="Enter your name")

    page.dialog = ft.AlertDialog(
        open=True,
        modal=True,
        title=ft.Text("Welcome!"),
        content=ft.Column([user_name], tight=True),
        actions=[ft.ElevatedButton(text="Join chat", on_click=join_click)],
        actions_alignment="end",
    )
A dialog will be opened on the start of the program since we have set its open property to True.
When the user clicks on "Join chat" button, it will call join_click method that should send a message to all subscribers, informing them that the user has joined the chat. This message should look different from the regular chat message, for example, like this:
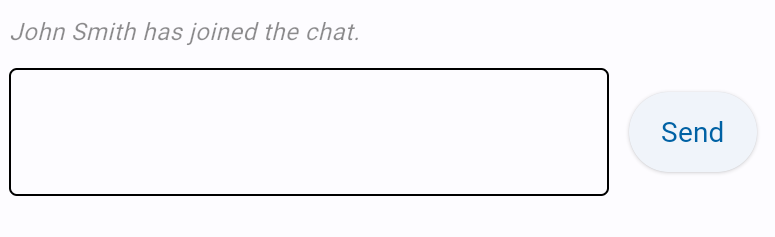
Let's add message_type property to the Message class to differentiate between login and chat messages:
class Message():
    def __init__(self, user: str, text: str, message_type: str):
        self.user = user
        self.text = text
        self.message_type = message_type
We will be checking message_type in on_message method:
def on_message(message: Message):
    if message.message_type == "chat_message":
        chat.controls.append(ft.Text(f"{message.user}: {message.text}"))
    elif message.message_type == "login_message":
        chat.controls.append(
            ft.Text(message.text, italic=True, color=ft.colors.BLACK45, size=12)
        )
    page.update()
Messages of "login_message" and "chat_message" types will now be sent on two events: when user joins the chat and when user sends a message.
Let's create join_click method:
def join_click(e):
    if not user_name.value:
        user_name.error_text = "Name cannot be blank!"
        user_name.update()
    else:
        page.session.set("user_name", user_name.value)
        page.dialog.open = False
        page.pubsub.send_all(Message(user=user_name.value, text=f"{user_name.value} has joined the chat.", message_type="login_message"))
        page.update()
We used page session storage to store user_name for its future use in send_click method to send chat messages.
User name dialog will close as soon as we set its open property to False and call update() method.
Finally, let's update send_click method to use user_name that we previosly saved using page.session:
def send_click(e):
    page.pubsub.send_all(Message(user=page.session.get('user_name'), text=new_message.value, message_type="chat_message"))
    new_message.value = ""
    page.update()
The full code for this step can be found here.
Enhancing user interface
Chat app that you have created in the previous step already serves its purpose of exchanging messages between users with basic login functionality.
Before moving on to deploying your app, we suggest adding some extra features to it that will improve user experience and make the app look more professional.
Re-usable user controls
You may want to show messages in a different format, like this:

Chat message will now be a Row containing CircleAvatar with username initials and Column that contains two Text controls: user name and message text.
We will need to show quite a few chat messages in the chat app, so it makes sense to create your own reusable control. Lets create a new ChatMessage class that will inherit from Row.
When creating an instance of ChatMessage class, we will pass a Message object as an argument and then ChatMessage will display itself based on message.user_name and message.text:
class ChatMessage(ft.Row):
    def __init__(self, message: Message):
        super().__init__()
        self.vertical_alignment="start"
        self.controls=[
                ft.CircleAvatar(
                    content=ft.Text(self.get_initials(message.user_name)),
                    color=ft.colors.WHITE,
                    bgcolor=self.get_avatar_color(message.user_name),
                ),
                ft.Column(
                    [
                        ft.Text(message.user_name, weight="bold"),
                        ft.Text(message.text, selectable=True),
                    ],
                    tight=True,
                    spacing=5,
                ),
            ]

    def get_initials(self, user_name: str):
        return user_name[:1].capitalize()

    def get_avatar_color(self, user_name: str):
        colors_lookup = [
            ft.colors.AMBER,
            ft.colors.BLUE,
            ft.colors.BROWN,
            ft.colors.CYAN,
            ft.colors.GREEN,
            ft.colors.INDIGO,
            ft.colors.LIME,
            ft.colors.ORANGE,
            ft.colors.PINK,
            ft.colors.PURPLE,
            ft.colors.RED,
            ft.colors.TEAL,
            ft.colors.YELLOW,
        ]
        return colors_lookup[hash(user_name) % len(colors_lookup)]
ChatMessage control extracts initials and algorithmically derives avatar color from a username.
Later, if you decide to improve control layout or its logic, it won't affect the rest of the program - that's the power of encapsulation!
Laying out controls
Now you can use your brand new ChatMessage to build a better layout for the chat app:

Instances of ChatMessage will be created instead of plain Text chat messages in on_message method:
    def on_message(message: Message):
        if message.message_type == "chat_message":
            m = ChatMessage(message)
        elif message.message_type == "login_message":
            m = ft.Text(message.text, italic=True, color=ft.colors.BLACK45, size=12)
        chat.controls.append(m)
        page.update()
Other improvements suggested with the new layout are:
ListViewinstead ofColumnfor displaying messages, to be able to scroll through the messages laterContainerfor displaing border aroundListViewIconButtoninstead ofElevatedButtonto send messages- Use of
expandproperty for controls to fill available space
Here is how you can implement this layout:
    # Chat messages
    chat = ft.ListView(
        expand=True,
        spacing=10,
        auto_scroll=True,
    )

    # A new message entry form
    new_message = ft.TextField(
        hint_text="Write a message...",
        autofocus=True,
        shift_enter=True,
        min_lines=1,
        max_lines=5,
        filled=True,
        expand=True,
        on_submit=send_message_click,
    )

    # Add everything to the page
    page.add(
        ft.Container(
            content=chat,
            border=ft.border.all(1, ft.colors.OUTLINE),
            border_radius=5,
            padding=10,
            expand=True,
        ),
        ft.Row(
            [
                new_message,
                ft.IconButton(
                    icon=ft.icons.SEND_ROUNDED,
                    tooltip="Send message",
                    on_click=send_message_click,
                ),
            ]
        ),
    )
The full code for this step can be found here.
This is the final version of the chat app for the purpose of this tutorial. Below you can read more about the enhancements that we have made.
Keyboard support
Focusing input controls
All data entry controls have autofocus property which when set to True moves initial focus to the control. If there is more than one control on a page with autofocus set, then the first one added to the page will get focus.
We set autofocus=True on a username TextField inside a dialog and then on a TextField for entering chat message to set initial focus on it when the dialog is closed.
When a user click "Send" button or presses Enter to submit a chat message, TextField loses focus.
To programmatically set control focus we used TextField.focus() method.
Submitting forms on Enter
It's so tempting to submit forms with just pushing Enter button on the keyboard! Type your name in the dialog, hit Enter, type a new message, hit Enter, type another, hit Enter - no mouse involved at all! 🚀
Flet has support for that by providing TextField.on_submit event handler which fires when a user press Enter button while the focus is on the TextField.
Entering multiline messages
What about multiline TextFields where Enter must advance a cursor to the next line? We've got that covered too! TextField control has shift_enter property which when set to True enables Discord-like behavior: to get to a new line user presses Shift+Enter while hitting just Enter submits a form.
Animated scrolling to the last message
Noticed a nice animation of scrolling to the last message in a chat window? It could be enabled by setting ListView.auto_scroll property to True. The top most Page class, being a scrollable container itself, also supports auto_scroll.
Page title
Final touch - page title that could be changed as simply as:
page.title = "Flet Chat"
page.update()
Deploying the app
Congratulations! You have created your Chat app in Python with Flet, and it looks awesome!
Now it's time to share your app with the world!
Follow these instructions to deploy your Flet app as a web app to Fly.io or Replit.
What's next
There are plenty of features we could implement to improve this chat app:
- Disconnect, reconnect, session timeout
- Upload/download images
- Authentication, avatars
- Using database for the storage
- Chat channels, topics
- Full-text search
- Emojis, markdown
- Bots
- Mobile app
Please let us know if you would like to contribute to the app/tutorial and share it with other Flet developers.
Summary
In this tutorial, you have learnt how to:
- Create a simple Flet app;
- Add page controls and handle events;
- Use built in PubSub library;
- User AlertDialog for entering user name;
- Build page layout with reusable controls;
- Deploy your Flet app to the web;
For further reading you can explore controls and examples repository.
We would love to hear your feedback! Please drop us an email, join the discussion on Discord.